GETTING STARTED
Quick Start
Send your first API request in under 60 seconds. This guide walks you through the UI, making a request, reading the response, and saving your work.
1. Open API Studio
There are three ways to open the panel:
API Studio: Open
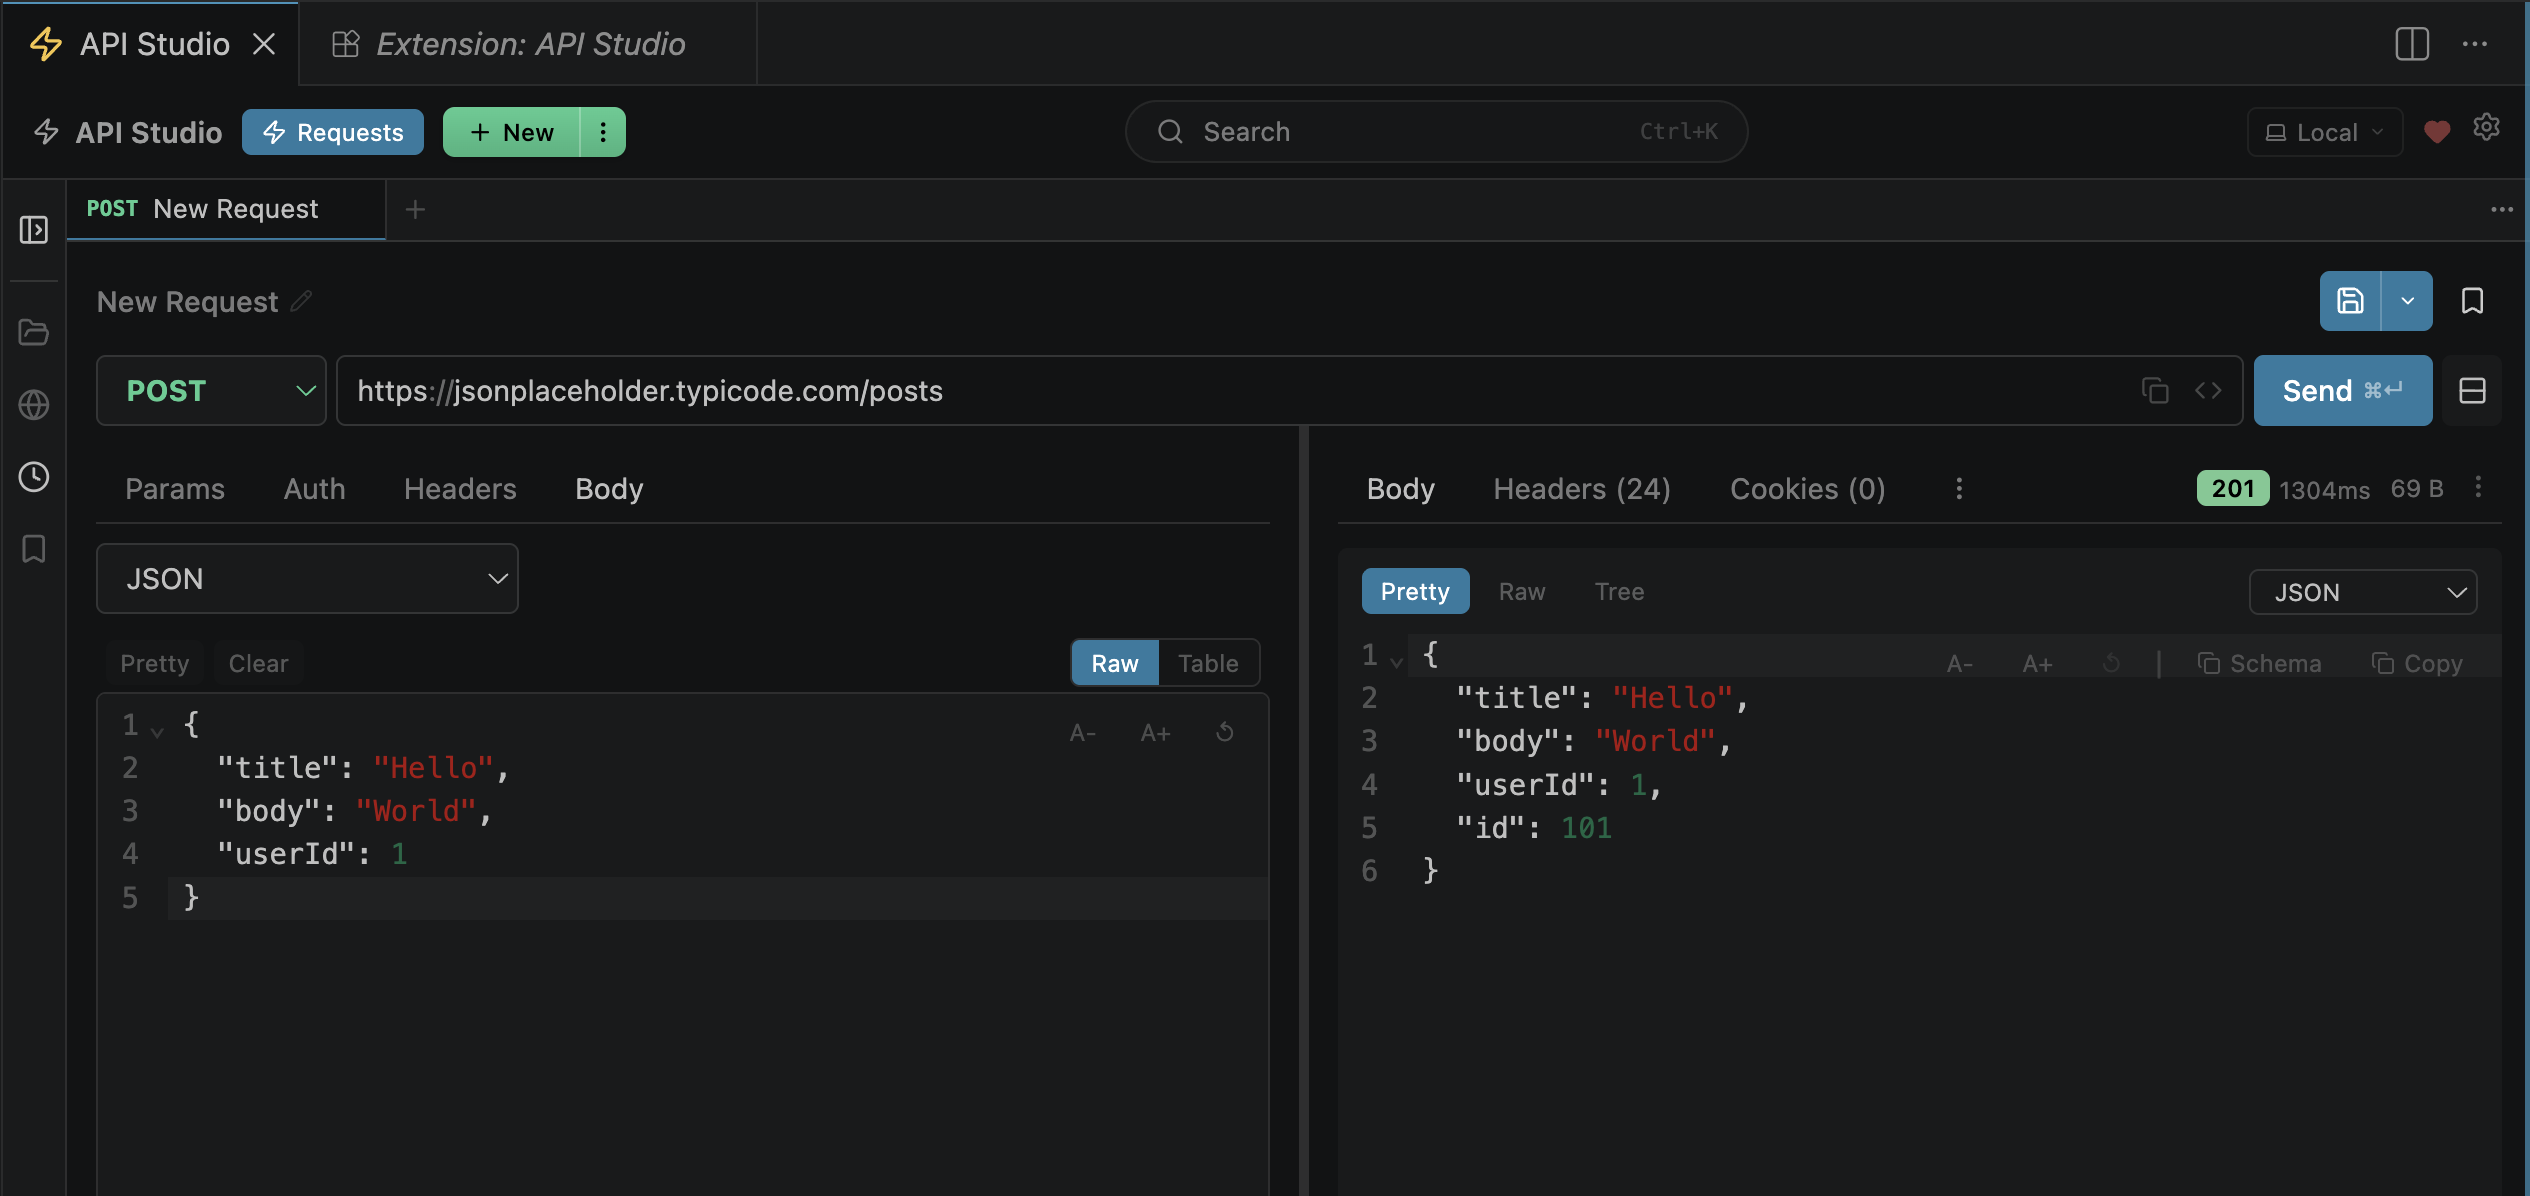
2. Understanding the UI
The panel is split into key areas. Here's what each part does:
Top Bar
View switcher (Requests / Mock+MCP / Vault), environment dropdown, settings gear, and the ⚡ new request button.
Sidebar (Left)
Four tabs — Collections (saved requests), Environments, History (auto-saved), and Snapshots (contract tracking). Collapsible to maximize workspace.
Tab Bar
Multi-tab interface. Each request opens in its own tab. Tabs persist across sessions. Right-click for grouping options. Unsaved changes show a dot indicator.
Request Builder
Protocol selector, HTTP method dropdown, URL bar, and the Send button. Below: sub-tabs for Params, Headers, Body, Auth (and Tests, Scripts, MCP, Settings in Advanced mode).
Response Viewer
Shows status code (color-coded), response time, body size. Tabs: Body (pretty/raw/tree), Headers, Cookies, Request (actual sent), Test Results. Supports syntax highlighting and search.
3. Send Your First Request
-
1
In the URL bar, enter:
https://jsonplaceholder.typicode.com/posts/1 - 2 Leave the method as GET (default)
- 3 Click Send or press Cmd+Enter
The response appears on the right with a green 200 OK status.
Try a POST request next:
POST https://jsonplaceholder.typicode.com/posts
Body (JSON):
{
  "title": "Hello from API Studio",
  "body": "Testing the offline API client",
  "userId": 1
}
4. Reading the Response
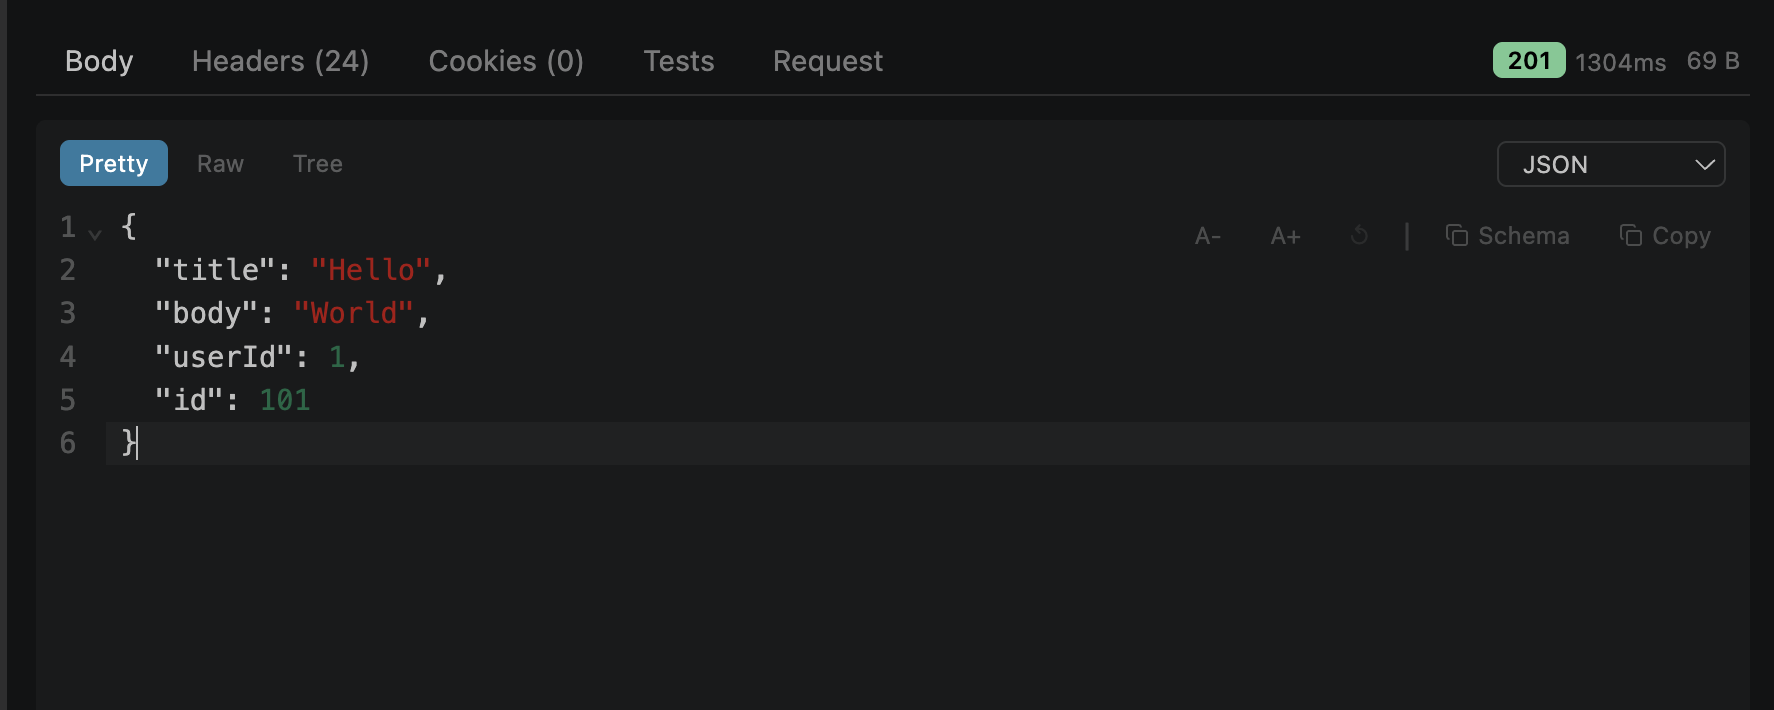
Status Bar
Color-coded status: green (2xx), yellow (3xx/4xx), red (5xx). Shows response time in ms and body size in bytes/KB.
Body Tab
Three views: Pretty (syntax-highlighted, foldable), Raw (plain text), Tree (interactive JSON tree with collapse/expand).
Headers & Cookies
Response headers in a table. Cookies tab shows parsed cookie fields (domain, path, expires, httpOnly, secure).
Request Tab
Inspect the actual request sent over the wire — fully resolved URL, injected auth headers, final body. Formatted and raw HTTP views.

The Request tab shows exactly what was sent — useful for debugging auth and variable issues
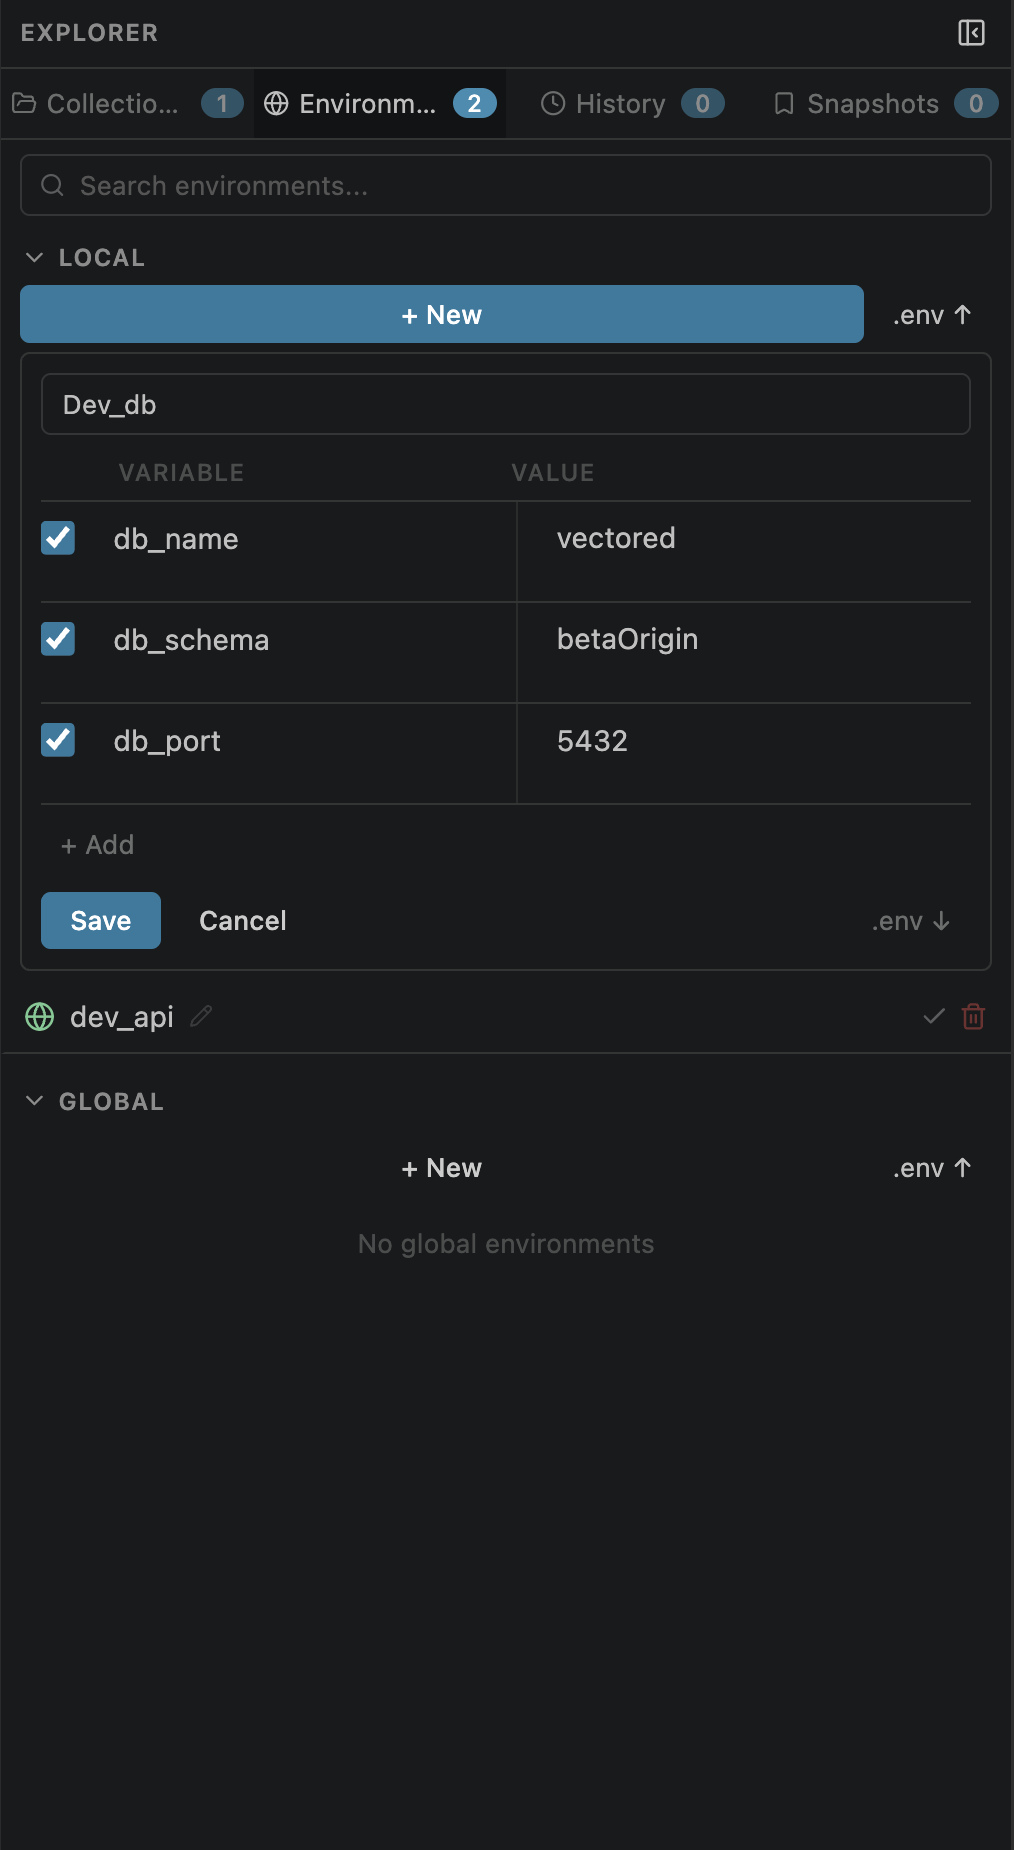
5. Create an Environment
Environments let you use {{variables}} in your URLs, headers, and body — switch between dev/staging/production without editing requests.
- 1 Click the Environments tab in the sidebar
- 2 Click + New Environment, name it "Development"
-
3
Add a variable: key =
base_url, value =https://jsonplaceholder.typicode.com - 4 Select it from the environment dropdown in the top bar
-
5
Now use
{{base_url}}/posts/1in the URL bar
Variables are color-coded: green = resolved, orange = unresolved (not found in active environment)
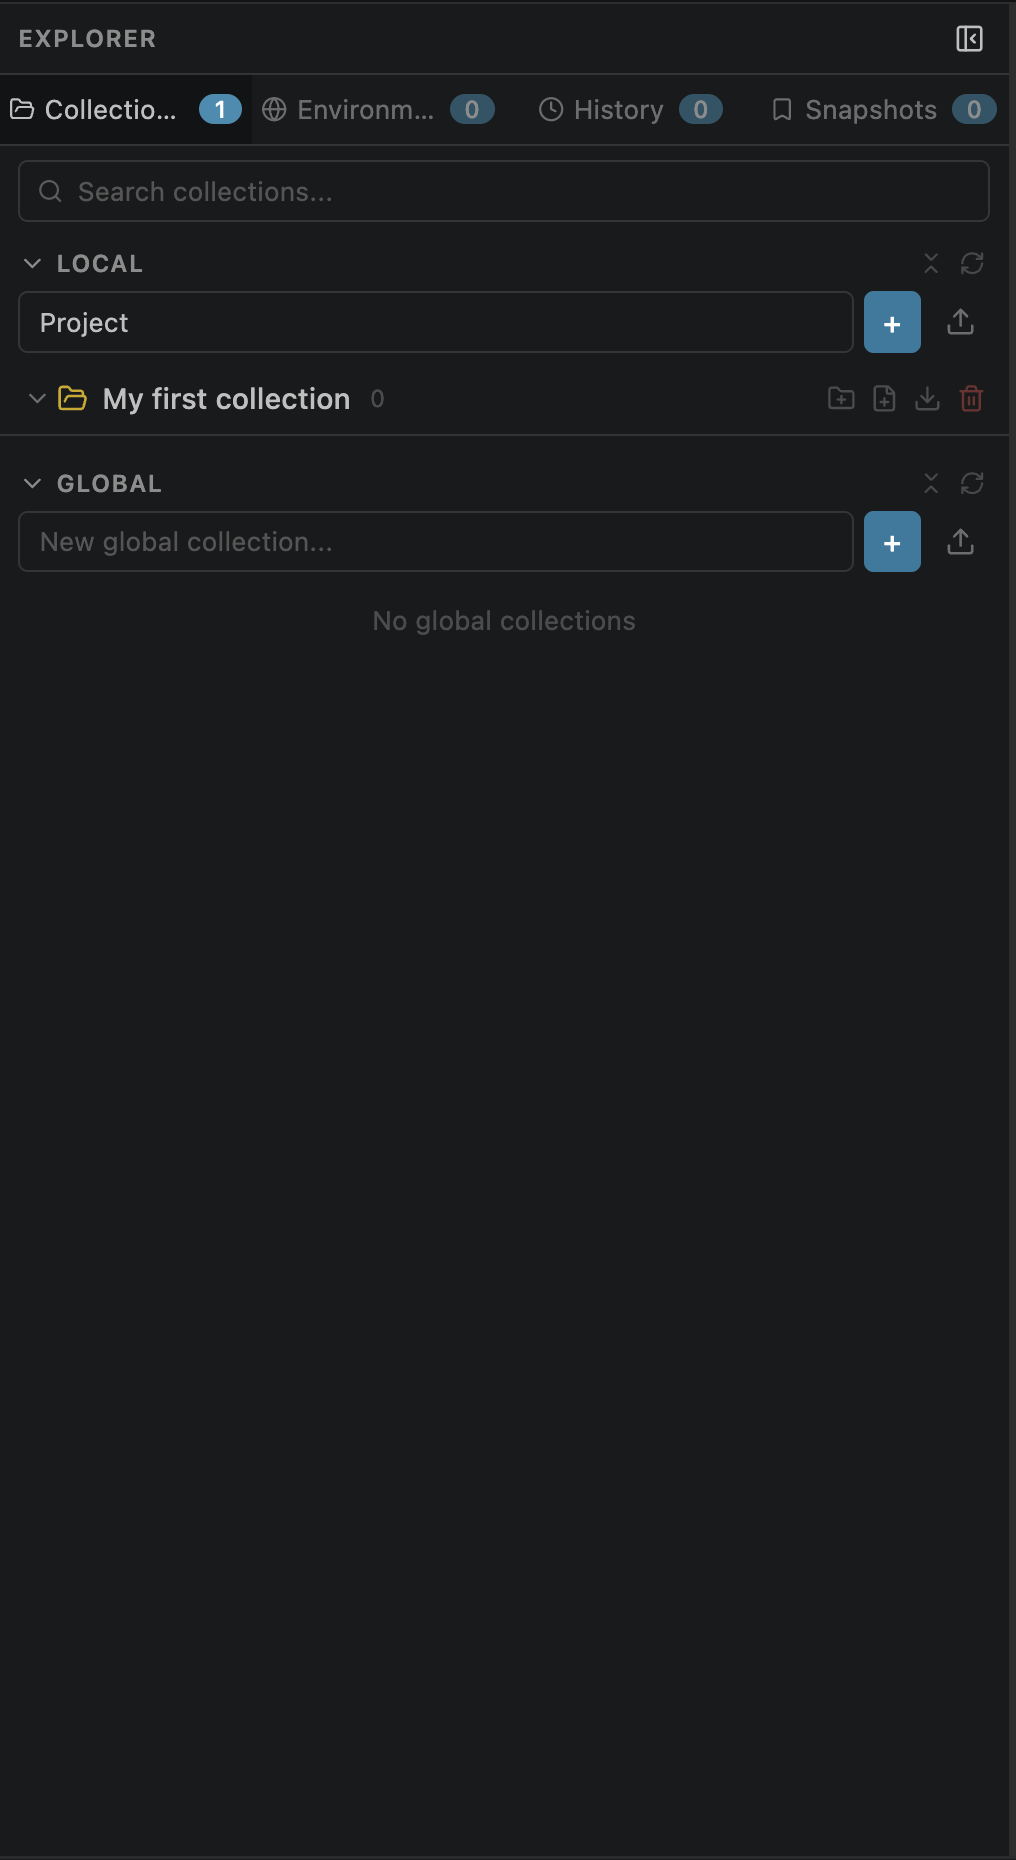
6. Save to a Collection
Collections organize your requests into named groups with folders. Saved requests can be re-opened, run in batch, and shared via git.
- 1 Click the Collections tab in the sidebar
- 2 Type a name (e.g. "JSONPlaceholder") and press Enter to create a collection
- 3 In the request builder, click Save (or Cmd+S)
- 4 Pick the target collection and folder, give the request a name
Collections are stored in .openpost/collections.json — commit this to share with your team
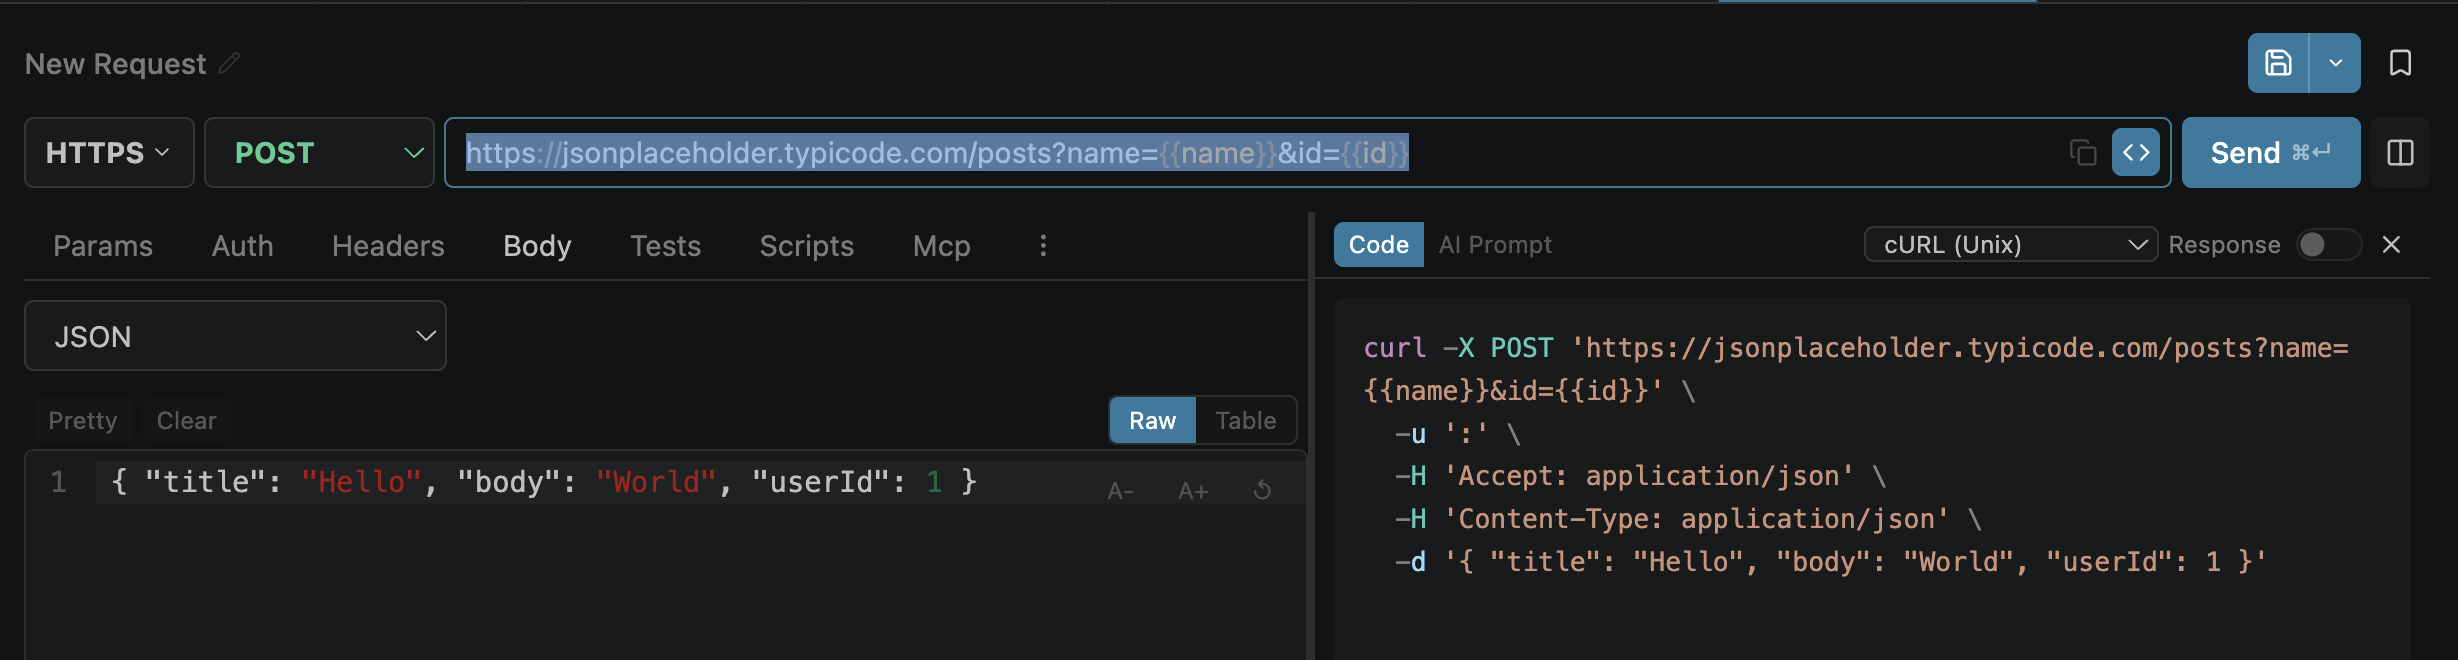
7. Export Code
Generate ready-to-use code from any request in 15 languages.
- 1 Click the </> button in the request builder (next to Send)
- 2 Choose a language from the dropdown (cURL, Python, JavaScript, Go, etc.)
- 3 Click Copy to clipboard — variables are resolved in the output
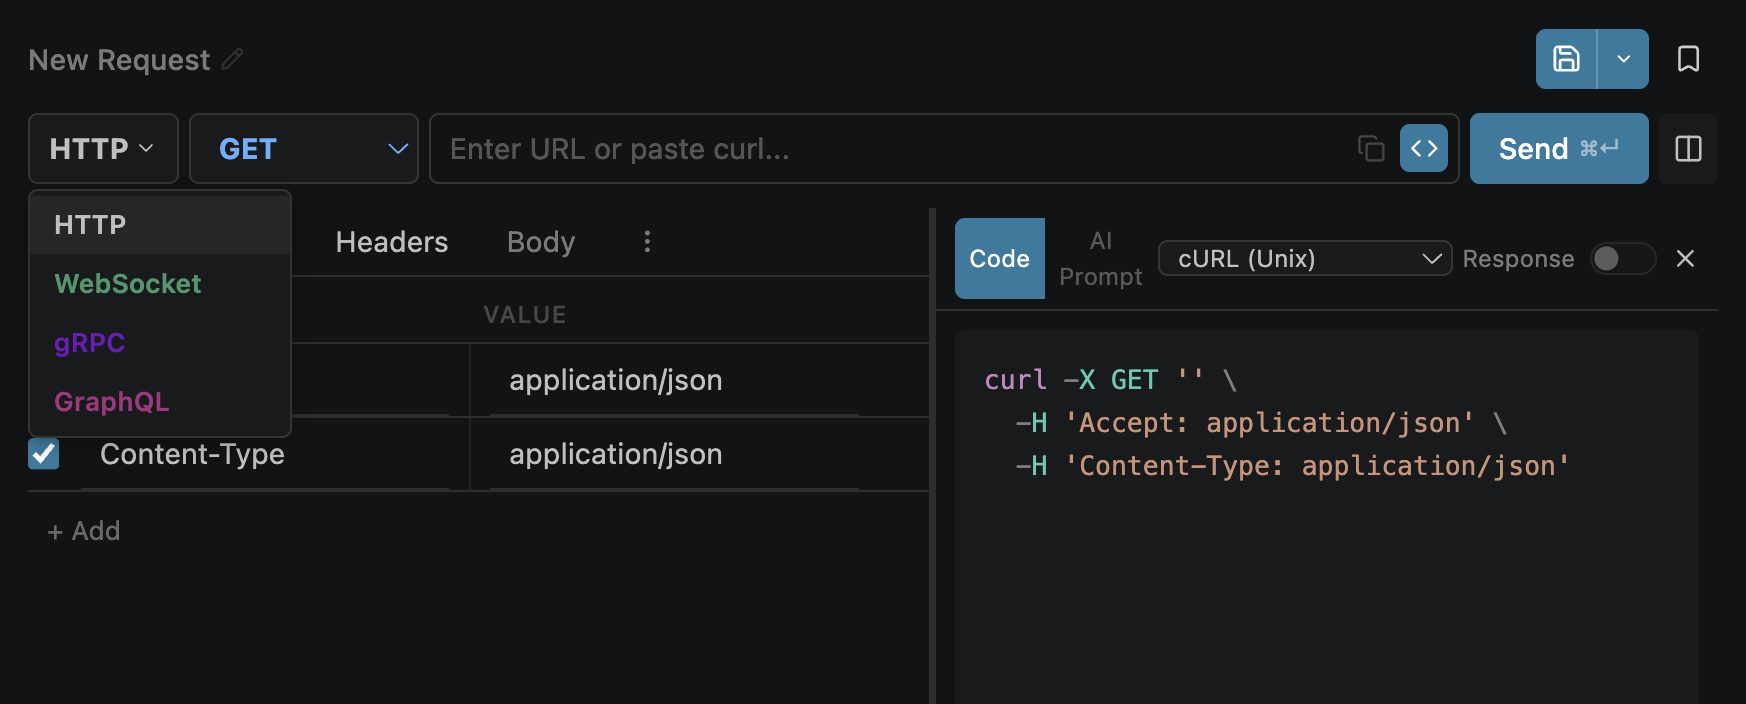
8. Try More Protocols
API Studio isn't just REST. Use the protocol selector to switch modes:
GraphQL
https://countries.trevorblades.com/graphql
Set protocol to "graphql" → Fetch Schema → use the builder
WebSocket
wss://echo.websocket.org
Button becomes "Connect" — send messages in real-time
SSE Streaming
https://sse.dev/test
Auto-detects SSE — events appear live in the Stream tab
gRPC
grpc://localhost:50051
Pick a .proto file → select service/method → Invoke
What's Next?
Now that you've made your first request, explore these features: