1. Overview
Editors of a space open a page straight into the editor. Your changes are saved as you type (All changes saved at the top), and everyone editing the page sees them at once; see Editing together. Readers keep seeing the published version until someone chooses Publish; see Drafts and publishing.
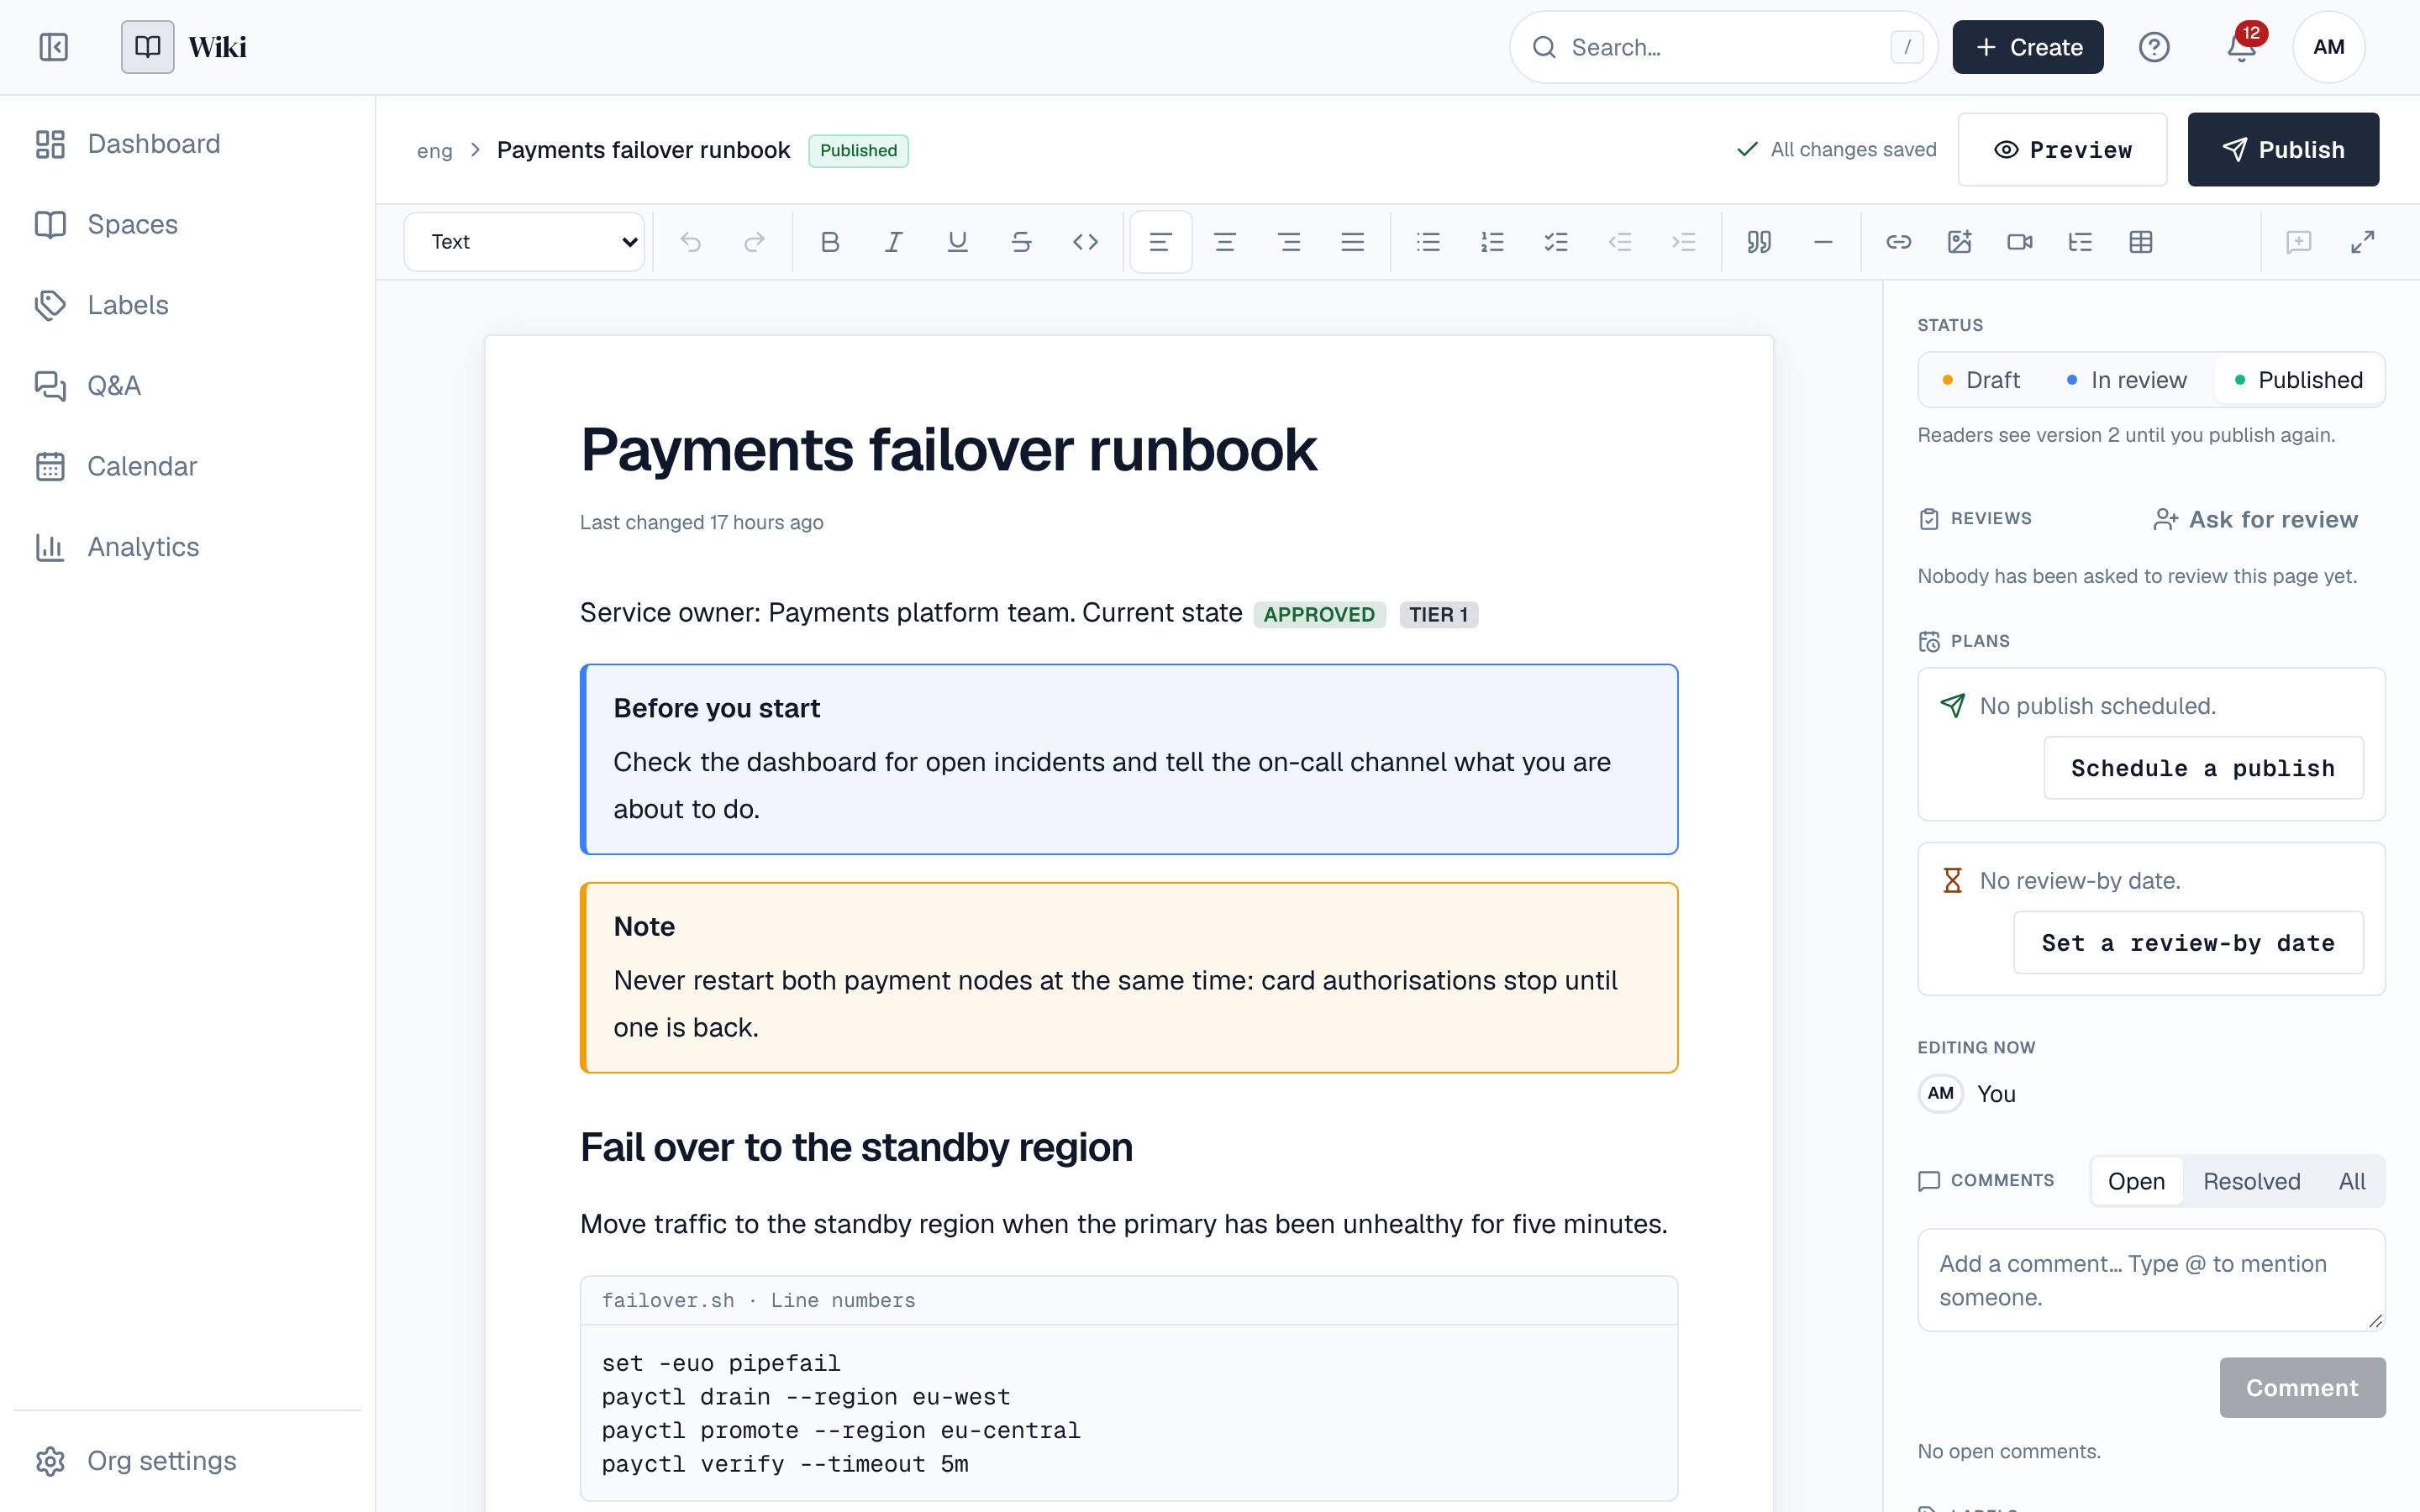
- The top bar holds the breadcrumbs, the save state, who else is here, Preview (the draft as readers will see it) and Publish.
- The side panel holds the page's Status, reviews, plans (scheduled publishing and review-by dates), versions, heading and figure numbers, comments, labels, the pages under this one, Move and Delete.
- If the connection drops, the editor says Offline. Reconnecting… and keeps your changes in the tab until it is back.
2. The toolbar

| Group | Tools |
|---|---|
| Text style | Text, Heading 1, Heading 2, Heading 3, Code block |
| History | Undo, Redo (your own changes only, not other people's) |
| Marks | Bold, Italic, Underline, Strikethrough, Code |
| Alignment | Align left, Center, Align right, Justify |
| Lists | Bulleted list, Numbered list, Checklist, Outdent, Indent |
| Blocks | Quote, Divider |
| Insert | Link, Insert image, Insert video, Insert table of contents, Insert table |
| Other | Comment on selection, Full screen |
When a table, image, video or block is selected, its own settings appear in the toolbar (Table, Image settings, Video settings, Block settings). On a phone, the toolbar scrolls sideways.
3. The "/" menu
Type / at the start of a line or after a space to insert any block. Keep typing to narrow the list, use ↑ and ↓ to move, Enter to insert and Esc to close it.
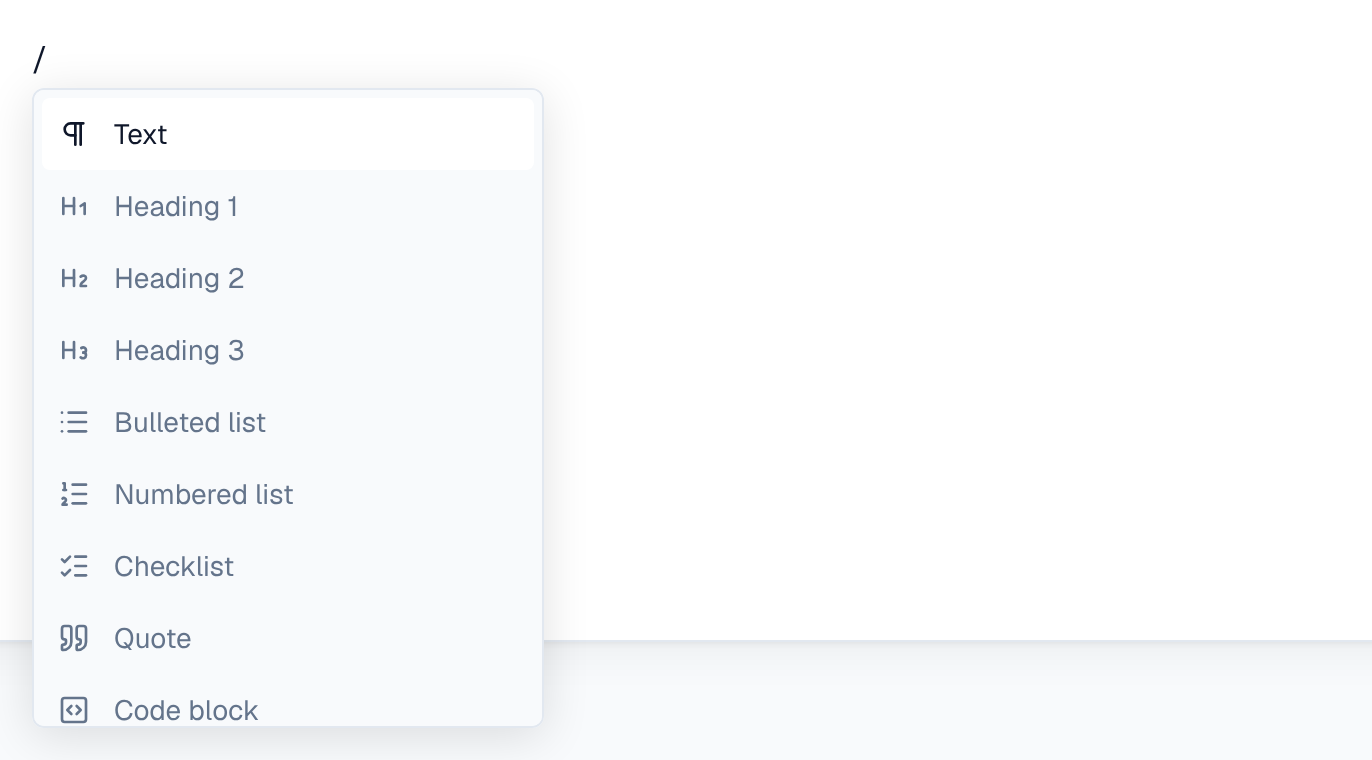
It lists text styles and lists, Quote, Code block, Divider, Table, Spreadsheet table, Image, Video, Table of contents, and the blocks described in Blocks and macros: Mermaid diagrams, HTML blocks (when turned on), panels, expand, decision, status, anchor, excerpt, page properties, child pages, page tree, recently updated, include page, include excerpt, page properties report, a whiteboard (Enterprise), and blocks from plugins.
4. Headings and heading numbers
Use Heading 1 to Heading 3 to structure a page. Each heading gets an anchor from its words, so you can link to it with #section-… after the page's address, and a table of contents lists it.
Heading numbers in the side panel numbers a page's headings: None, 1, 1.1, 1.1.1 or 1., 1.1., a.. Numbers are added when the page is shown; the text stays as you write it, so moving a section renumbers everything after it.
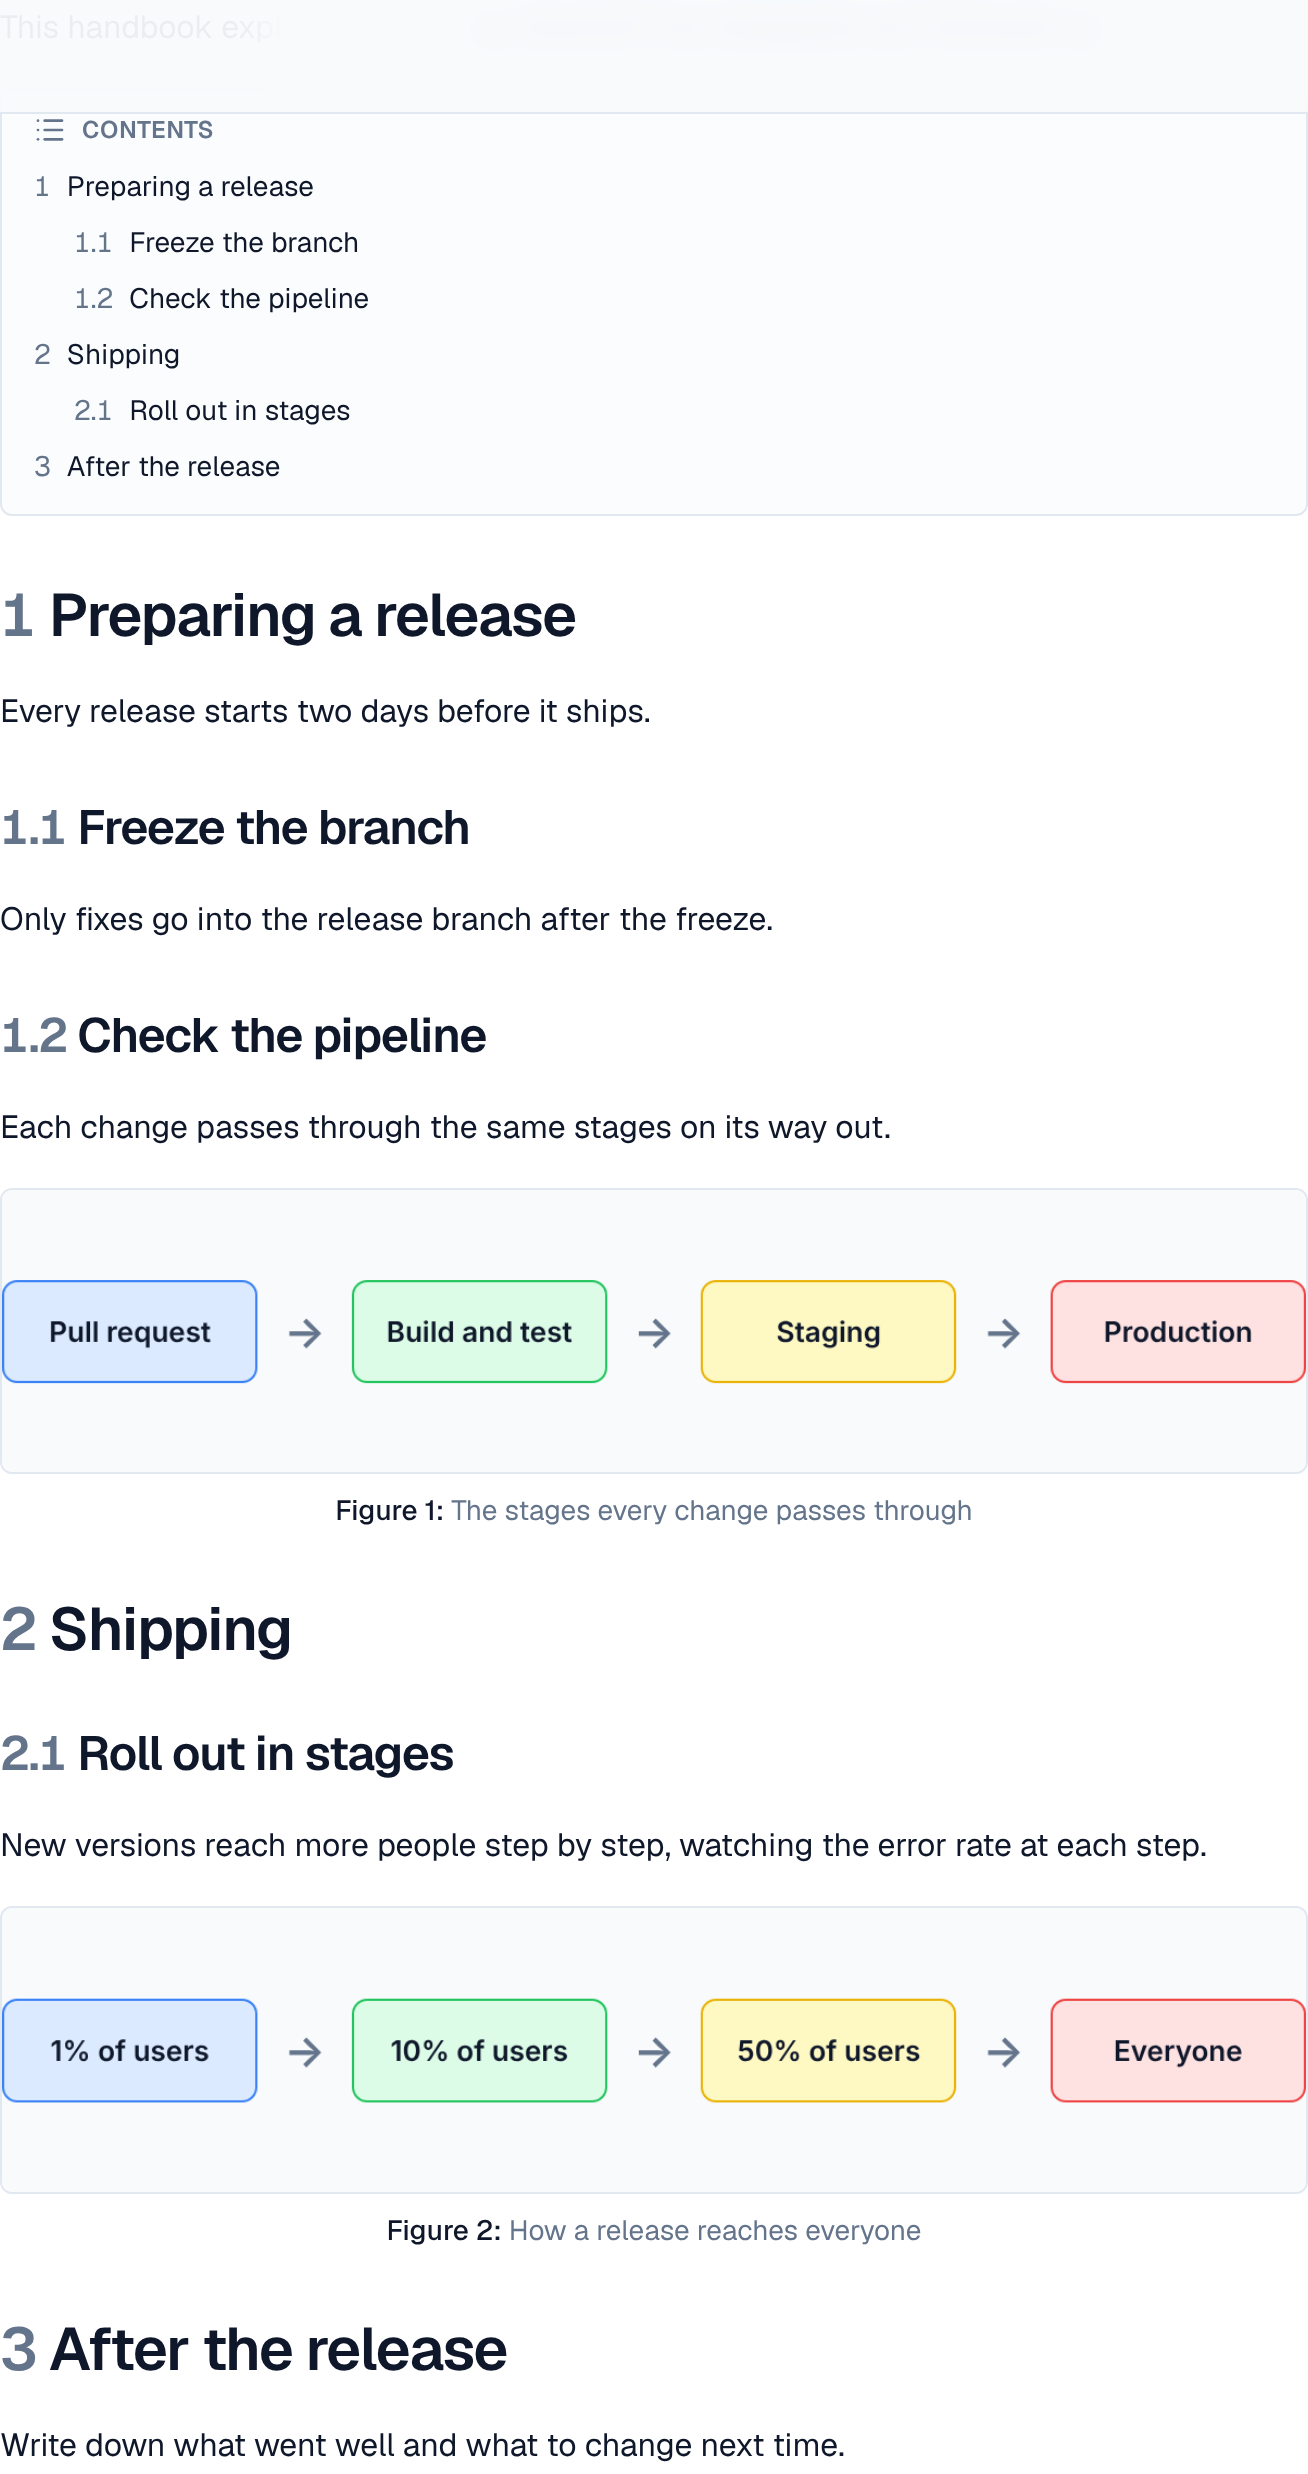
Insert table of contents lists the page's headings where you put it. Its settings choose the Headings to list (top level only, two levels or three levels) and whether to Number the entries; when the page numbers its headings, the same numbers are used.
5. Lists and checklists
Bulleted list, Numbered list and Checklist start a list; Indent and Outdent (or Tab and Shift+Tab) nest an item. Readers see checklist boxes as you left them.
6. Links and mentions
Select text and choose Link to link it to a web address (https://…), an email (mailto:…) or a path in the Wiki (/spaces/…). Type @ and part of a name to mention someone; see Profile and notifications.
7. Tables
Insert table adds a table with a header row. With the cursor in it, the Table tools add a row below or a column after, delete rows, columns or the table, turn the header row on or off, and merge or split cells. For sums and other calculations use a Spreadsheet table; see Blocks and macros.
8. Images and videos
Insert image, or paste or drop an image onto the page. Image settings sets the Alternative text (describe the image for people who can't see it), a Caption, the Width (a quarter, half, three quarters or full width) and the Position. With Figure numbers turned on in the side panel, captioned images are numbered Figure 1, Figure 2… in reading order.
Images can be PNG, JPEG, GIF or WebP up to 20 MB. For videos, files and limits see Attachments and media and Blocks and macros.
9. Full screen
Full screen at the right end of the toolbar hides the sidebar and header so only the page and toolbar remain. Leave full screen, or Esc, brings them back.
10. Keyboard shortcuts
Use Ctrl on Windows and Linux, ⌘ on a Mac.
| Shortcut | Does |
|---|---|
| Ctrl+B / Ctrl+I / Ctrl+U | Bold / italic / underline |
| Ctrl+Shift+S | Strikethrough |
| Ctrl+E | Code |
| Ctrl+Alt+1, 2, 3 | Heading 1, 2, 3 |
| Ctrl+Alt+0 | Text |
| Ctrl+Shift+8 / Ctrl+Shift+7 / Ctrl+Shift+9 | Bulleted list / numbered list / checklist |
| Ctrl+Shift+B | Quote |
| Ctrl+Z / Ctrl+Shift+Z or Ctrl+Y | Undo / redo your own changes |
| Shift+Enter | Line break inside a paragraph |
| / | The "/" menu |
| @ | Mention someone |
| Ctrl+K | Search |
| Esc | Close a menu, leave full screen |
Markdown-style typing works too: # to ### at the start of a line make headings, - or * a bulleted list, 1. a numbered list, [ ] a checklist item, > a quote, three backticks a code block and --- a divider. bold, *italic* and ` code ` format the text as you type.